Getting Started
Thank you for purchasing AuthorMATIC Support System and the Docskit theme.
This documentation covers mostly all you need in configuring your Docskit theme for AuthorMATIC . If you need the documentation for AuthorMATIC, please click here.
If you have any questions beyond the scope of this documentation, please do not hesitate to request for help via the support system. Thank you so much!
Installation
Follow these steps to to have AuthorMATIC install properly on your hosting platform.
- Download the zip file from CodeCanyon.
- Extract the zip file on your system.
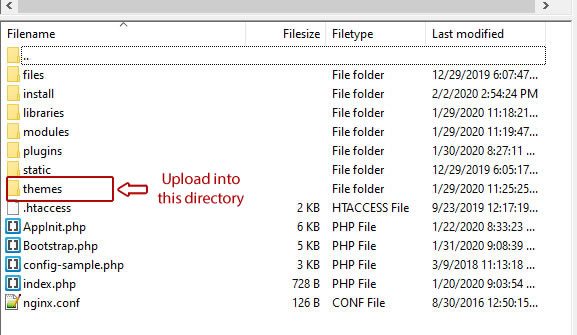
- Navigate to extracted folder and upload "Docskit.zip" to the root(/public_html/themes/) directory of your hosting.
- Extract the contents of the uploaded zip file to that directory using your CPanel File Manager, if applicable.
- After extraction, visit your theme page in AuthorMATIC: Go to Appearance -> All Themes
Manual Update
To manually update this theme without overriding your changes, check the change logs here: https://dev.silasolatayo.com/docskit/change-logs to see the list of files affected by the changes.
Click on the "Files" button to see the list of files affected/modified; then copy these files and replace them in you theme folder.
Licensing
Kindly read the Licensing information for the purchase of this product on https://codecanyon.net/licenses/terms/regular
Please note that you are permitted to use ONLY ONE LICENSE PER USE of this product. If you need further clarification on this, please do not hesitate to contact us.
Also, this product requires you provide the license information for activation of the theme. Please read this to learn how to get your Envato item code: https://dev.silasolatayo.com/article/4/how-to-get-purchase-code-of-an-item-on-envato
Configuration & Usage
After a successful upload and installation, you can then visit the theme page as mention earlier; Go to Appearance -> All Themes i.e http://yourdomain.com/pathToAdminArea/settings/themes/.
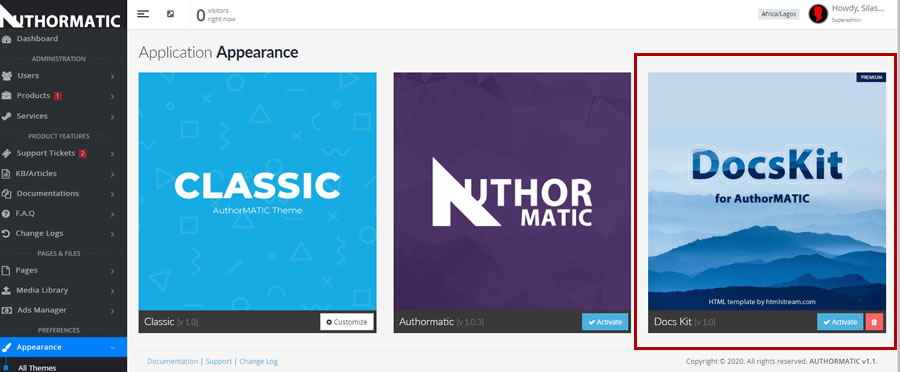
It's advisable to set your website maintenance mode to ON before Activating & Customizing this theme. The reason for doing this is logical; the theme is NOT pre-installed with any parameters or value on activation. Therefore, the website may look scanty or empty to the public. So, set the maintenance mode ON, on General Settings page, while you edit/configure the theme. Then set OFF when done.
Theme Activation
Since Docskit is a premium theme, it requires activation with your Item Purchase Code. You can retrieve your code as described above.
Click the "ACTIVATE" button to activate the theme. A pop-up modal will display for you to enter the activation code.
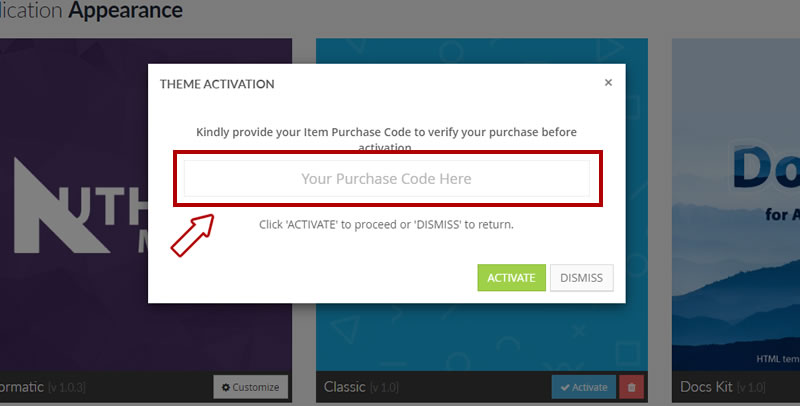
Please enter a VALID purchased code as retrieved from your Envato account to activate the theme. Upon successful activation, you can then click on "CUSTOMISE" button to customize the theme.
General Options
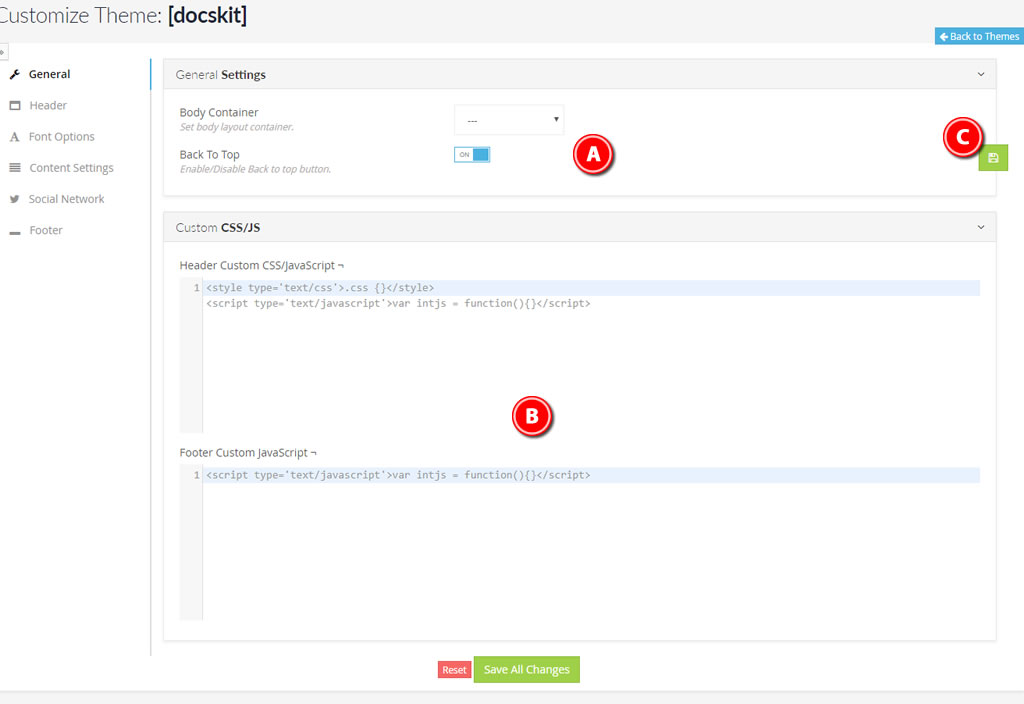
A. GENERAL OPTIONS - On this tab, you can set the general bootstrap body layout for the theme. You can either disable Back-To-Top button or leave it on.
B. CUSTOM CSS/JS - You add custom CSS or JavaScript to the header and footer of the website via this input field. It's advisable to add ONLY style sheet to the header part and not to the footer. You can have JavaScript in both part.
C. QUICK SAVE BUTTON - A floating quick save button to effect your changes at any point of editing the theme.
Theme Header
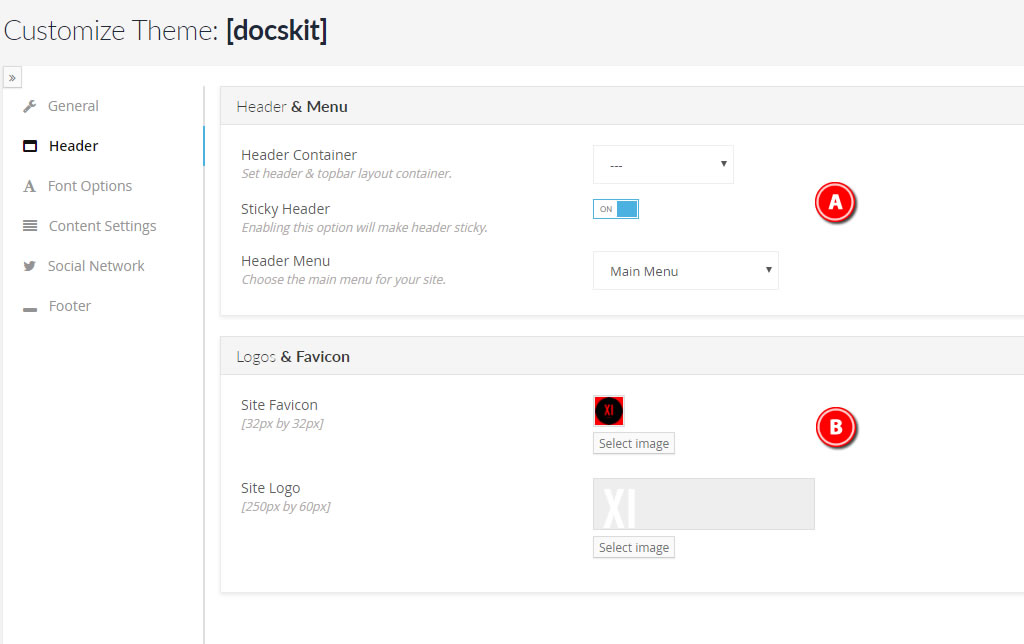
A. HEADER & MENU - Set your header container to a relative option for the body( as you did in General Option). Leave empty to use the default. You can also toggle ON/OFF the sticky header to fix the page header or not. Select from the available menu to use as the main page header menu. PLEASE NOTE, you need to have set/created this menu prior to the configuration to make it available for selection.
B. LOGO & FAVICON - Your favicon size should be 32px by 32px PNG file. While your logo size for this theme should be, at-most, 250px by 60px in dimension to display properly.
Font Options
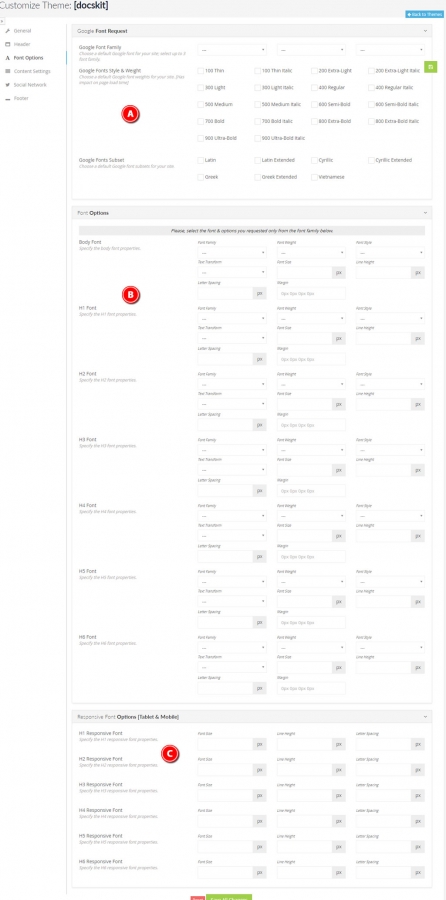
A. GOOGLE FONT - By using Google Fonts for your font family, the theme allows you to request up to 3 fonts at the same time; that can be use through-out the whole page. You must select the font style, font weight and font subset to request as well.
B. FONT OPTION - Please select only the request font family front this list; respective style and weight are expected to be use ONLY.
C. RESPONSIVE FONT OPTION - Set the Size, Line Height and Spacing of your headings on mobile devices.
Content Settings
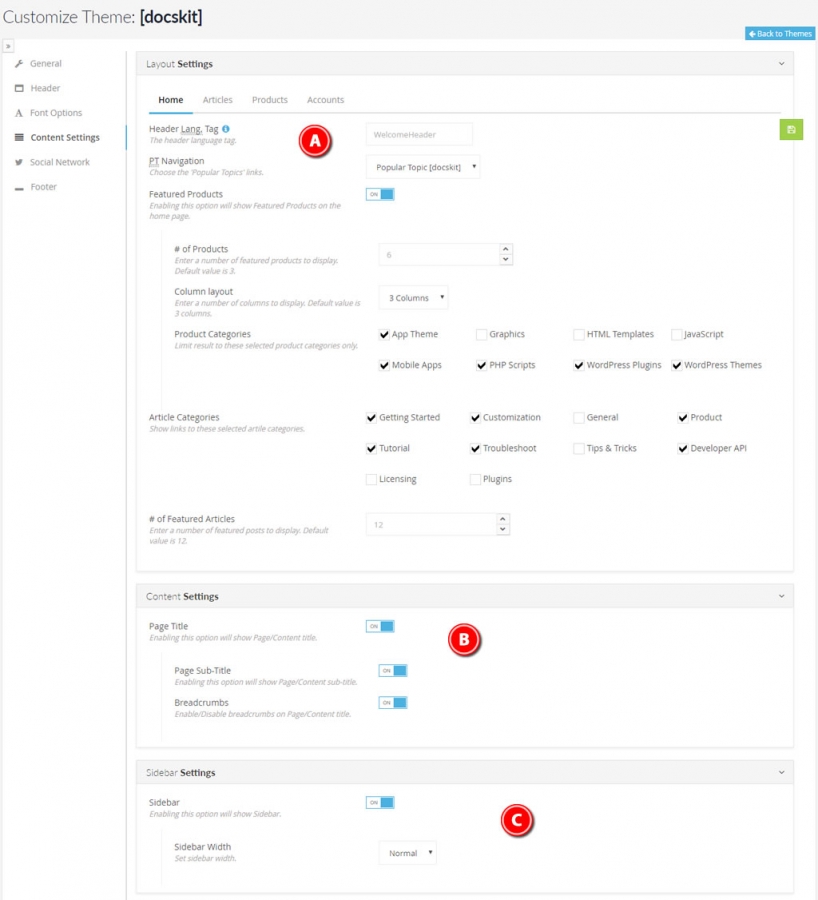
A. LAYOUT SETTINGS - The layout setting let you manage the way your website is being displayed. basically, all settings basic labeled with description.
- The HOME tags help you manage the Home page.
- The Header Language Tag can be created in your theme language and referenced here. You have to use the Tag as created in the theme without space or any special characters.
- On the home page, The Popular Topic links can be selected from Menu list you've created on the menu page.
- Featured Products display all product you starred. You can limit the list by categories. Also set the column layout.
- Featured Article is enabled by default and always displayed. You can also limit the content to selected categories.
- The Article Tab let you set how your article/KB is to be displayed. The description of each option can be helpful.
- The search page requires Google CSE ID which can be generate here: https://cse.google.com/cse/all
- Please note that you need to enable Global Sidebar Setting for any sidebar to be displayed.
- The Product Tab is as descriptive as the other tab as well. This theme has the option of multi-page documentation for your product. You can select One Page or Multi-page option for you documentation.
B. CONTENT SETTINGS - It's important you have page title enabled. You can toggle page bread-crumbs and page sub-title(if applicable)
C. SIDEBAR SETTINGS - This is the global sidebar option. If disabled, no sidebar would be displayed. You also have the option of resizing the width of the page sidebar.
Support
If you have purchased this product and you have questions, please don't hesitate to reach out for help: https://dev.silasolatayo.com/account/tickets#new
Pre-sale questions are welcome on Codecanyon comment wall.
Change Logs
You can view all change logs for this product here: https://dev.silasolatayo.com/docskit/change-logs
Social Network
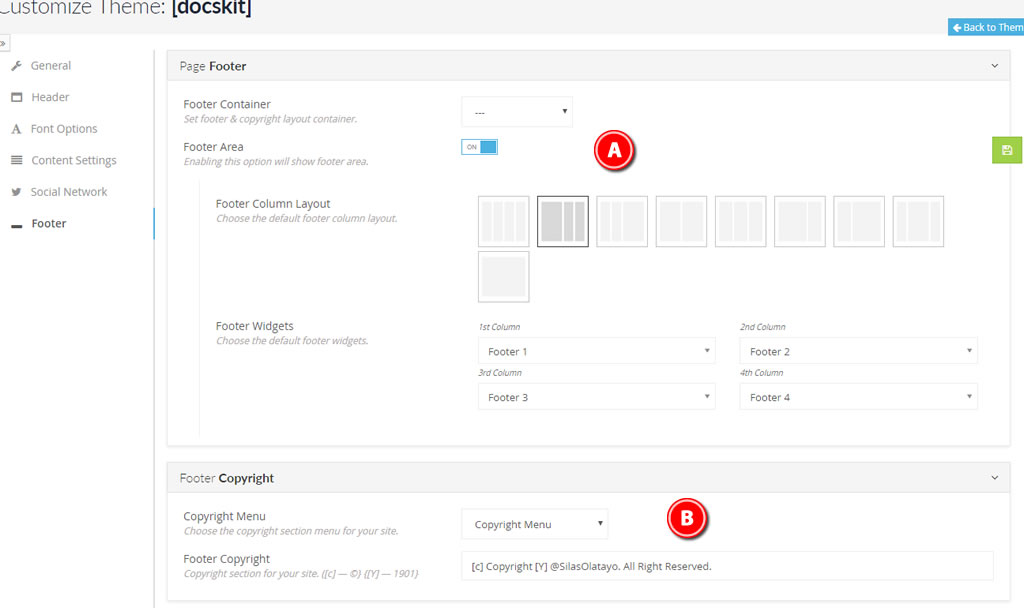
A. SOCIAL SHARING - Display ShareThis button on most pages of your site. You need to create a Propery ID on www.sharethis.com
B. SOCIAL NETWORK ACCOUNT - Add you social account easily to your site. This is also made available on the sidebar page for easy integration.